|
Hooked on Felting (Part 3)
Foam Work Bases and Creating a Wire Armature
By Neysa A. Phillippi
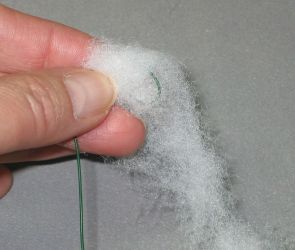
Step One - wool
|
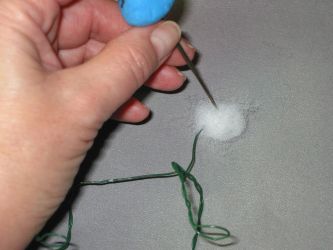
Step 2 - Start with the head
|

Step 3 - Felt head armature |

Step 4 - Head base finished |
Beginning Your Wire Armature Project Needle Felting Last issue I wrote about making a wire armature for a cat (you may have created any critter) for this project. The wire armature cat I created is three inches high, I used approximately one yard
(1 meter) of 22 gauge floral wire. In this issue we will begin our visual project.
When needling be sure to lift your project often as it will begin to stick or needle into your foam work surface. The foam will deteriorate eventually, moving your project around will lengthen the life of the foam… plus you have more sides to work on don’t you?
When making a three dimensional critter you must keep turning and needling all the way around your project. Add more batt or roving as you needle. The longer you needle your item, the harder the felted wool will be. Within a few minutes, it will be sticking together.
When making a three dimensional critter, use a 36 T or 36 S gauge needle to start and poke or needle the fiber into itself, when you have a fairly firm base you will begin to add batting in layers needling it into itself as you go, be sure to turn and move your project often. After a few layers and in a reasonable amount of time you will want to change to your 38 T or 38 S needle, you will be able to “feel” the change and know it’s time to change to a higher number needle. Now it will begin to look like something. As your project progresses you will start to add details such as muscle structure … now you are getting somewhere. Don’t be surprised if it takes hours to get to the point where it looks like something. This is not a “quick” art form. I have found that I spend a minimum of 12 hours making a three-inch critter.
Needle felting is like sculpting with clay, you add layers or slabs and work them into the piece you are creating. Sculpting takes time so does needle felting, be patient, if you are getting tense and things don’t seam to be going right, set it aside, put your needles away and go have a piece of chocolate and a cappuccino (check out B&B’s Chocoholics Anonymous). All will look better when you have stepped away and then return. Caffeine and chocolate does work wonders!
I start needling the head first, when it is almost the size of the finished head I want I will begin to felt the neck and body.

Step 5 Start with head first.
Needle the end of your batt piece to the head, just enough to anchor it to the head. |

Step 6 - Add more to the head.
|

Step 7 - Wrap the batt around the neck and needle; be sure to turn your project so that you are needling all around the armature, adding layers as you work.
|

Step 8 - Continue needling neck.
|

Step 9 Needle felt around the legs, back (and tail if it has one) in the same way, attaching the batt and wrapping it around the armature. |

Step 10 Needle each appendage, adding layers as you work.
|

Step 11 - Needle legs and back. |

Step 12 Add wool and continue.
|

Step 13 Evenly needle the
armature with more wool. |
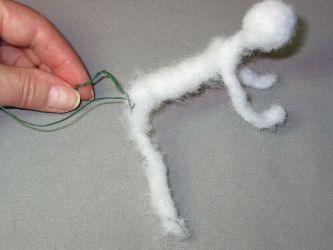
Step 14 |
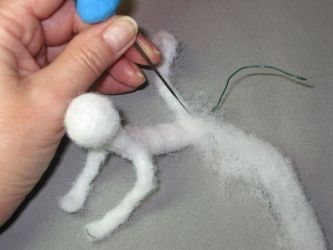
Step 15 |
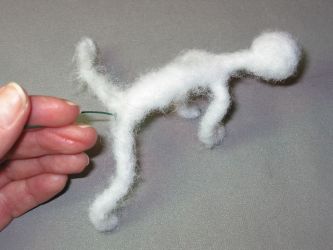
Step 16 Begriming to take shape.
|
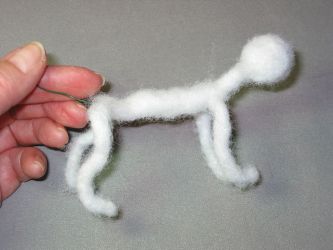
Step 17 Almost finished! |
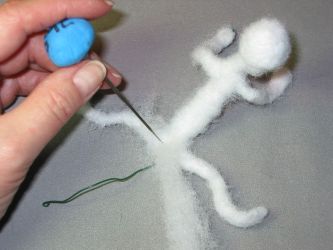
Step 18
|
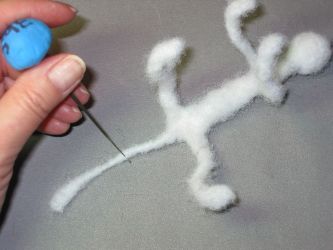
Step 19 |
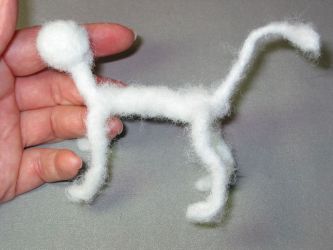
Step 20 Add muscle contours.
|
When you have your piece almost to the finished base form start to add muscle tone and contours. Add small pieces of batt to the areas you want to enhance. Create shoulders, buttocks, a hump if he is a bear and so on. At this point, viewing photographs of animals really helps you create a more realistic creature.
Until next month’s continued project get hooked on felting!
Neysa
Neysa A. Phillippi
45 Gorman Avenue
Indiana, PA 15701-2244 USA
Please direct comments on this article to: neysa@purelyneysa.com
|


 3428 Hillvale Road
  Louisville, KY 40241 USA