|
Hooked on Felting (Part 2)
Foam Work Bases and Creating a Wire Armature
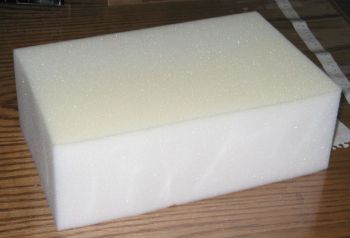 |
12” x 8” x 4” foam work base is best and if high quality will last a long time.
|
By Neysa A. Phillippi
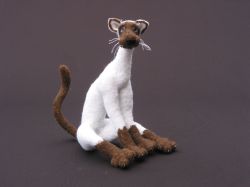
Last issue I wrote about the differences between batt and roving, what barbs were and explained felting needles and needle sizes. I gave you some simple cautionary measures to follow. This issue I will discuss foam work bases, making armatures and getting started on a critter – I’ve chosen a cat.
A foam work base is a necessity. A piece of high-density mattress foam (or upholstery foam) that measures 12” x 8” x 4” I find best suits my needs. The 4” thickness protects me from being stabbed while needling. Most people place the foam work base on their lap. The longest needle you will be using measures 3 ½”. When you start your project you will be needling deeper than when you finish, but by no means do you need to needle to the depth of the foam. If you are doing this your needling is way out of control. Remember being stabbed with the needle does hurt. Stay in control, pay attention and as you get better you do stab yourself less and less as time goes by.
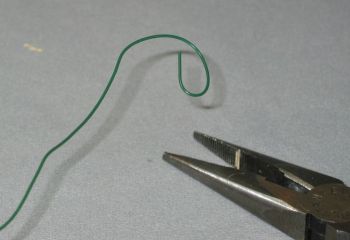 |
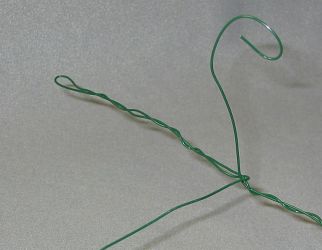
Figure A. - Bend the wire to form the head. |
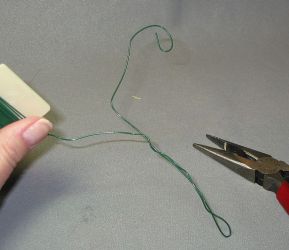 |
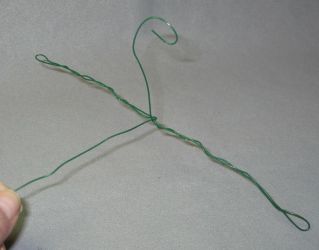
Figure B1. - Next, form the neck and the first front leg. |
|
Figure B2. - Form the other front leg. |
|
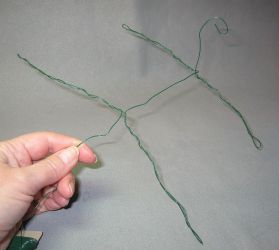
Figure C. - Form the back. |
|
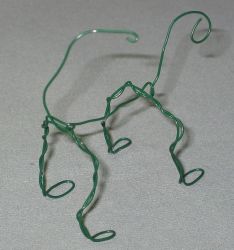
Figure D. - Form the back legs and the tail. |
|
Figure E. - Shape the the wire armature into a standing or sitting position.
|
 |
| Figure F. - If you apply floral tape to the armature, it will make it more stable for you to begin your project. |
Never lay your needles down while working; always stick them in your foam work piece. When you are not using your needles, put them in a sealed container.
High Density foam will last a long time. As you work move your project around, don’t needle in the same spot over and over again, if you do you will find that your batt or roving is going to start working it’s way into your foam and the foam into your project. The better the piece of foam the longer it will last. I buy mine from a foam company that makes it for mattresses. I have been working on the same piece of foam for two years. Foam from your local craft shop is not dense enough to last for very long, but it will get you started until you find a better piece of foam.
I prefer when making a three dimensional critter to use 22 gauge floral wire and make an armature to felt around. I find that using an armature keeps my creation to a specific size and shape. I form the wire in the shape of the critter I’m making. Depending on how hard I felt my critter, the wire armature will still make him posable. You may use pipe cleaners as an armature, but I find this method has it limitations as far as posability, but your first layer of wool sticks very well to the pipe cleaner. Floral wire is stronger and holds its’ shape better.
You do not have to use an armature to needle felt. I find using an armature gives me something more to hold on to while needle felting. My hands won’t hold small items for long anymore. Using an armature and having the foam as a work base has allowed me to work as small as I want. You can also make the armature so that you can later string joint your critter together. I’ll talk more about this armature in another issue.
The following project is literally in one hand and the camera in the other. I will be making a cat standing on all four legs, he has a wire armature so as I work his body shape can and will change until he is finished. I will show you in the following text, drawings and photographs how to begin making an armature for your cat.
Start your wire armature at the head, (See Photo - Figure A.) the head shown I find works best - it’s just enough to work around.
Add the neck, (See Photo - Figure B1 and B2.) go down one front leg then back up wrapping the wire around the established leg. Repeat with the other front leg.
(See Photo - Figure C.) Wind your wire around the top of the legs and neck and extend it to make his back.
Make the rear legs (See Photo - Figure D.) as you did the front, wind the wire around the top of the rear legs and back and add a tail if you are making a critter that has a tail. Cut the wire; curl the end back into itself.
(See Photo - Figure E.) Now shape or form the armature into a standing or sitting position, note how the arms and legs of the animal you are making bends, bend the armature the same way. Be sure to add body width to your armature. This step is where I find books about animals or studying resin statues come in handy, the photos or statues will teach you about the anatomy of the animal you are making.
Try wrapping floral tape around the armature, (See Photo - Figure F.) your first layer of batting or roving will stick to the taped armature and be more stable to begin your project. Floral tape is sticky when applied add your first layer of batt or roving immediately, the tapes stickiness’ does not last long. The only disadvantage to using floral tape is that the first layer felts slower. You also have to be more careful not to break your needle as the tape adds another “hard” object to felt around. Try with and without the tape and see which you prefer.
Once you have your armature made you are ready to start adding wool batt or polyester stuffing as a core fiber. This is where my next column will begin. See you next month! WORDS OF CAUTION: please keep felting needles out of reach of children
and pets. NEVER put a needle down and just leave it. Put it back in its envelope or in a sealed container. ALWAYS put needles away, particularly
if you have children or pets. It only takes one second for a child or pet,
to grab the needle and injure themselves.
Needle felting requires your undivided attention, especially where your
fingers and eyes are concerned. The needles are made of highly tempered steel, which means they are very sharp and brittle.
Needle in and out in a straight line. Never bend the needle or use it
to pick or pry with, such as to pick out straw that is in the wool - the
needle will snap.
When you break a needle and you
will, ALWAYS find the pieces and discard
them! Wearing glasses or goggles is
a good idea.
Think about updating your tetanus shot
next time you visit the doctor since you
are working with highly tempered steel
and natural wool fibers.
45 Gorman Avenue
Indiana, PA 15701-2244 USA
Please direct comments on this article to: neysa@purelyneysa.com
|

 3428 Hillvale Road